Purpose: Our propose for this whole blog was to test out the gas laws and how they contribute to many things, one being the firing of cannons.
Materials/Tools:
-2 Tennis ball cans
-18 inches of tape
-A protractor
-Scissors
-Compass

Procedure/Builder's Notes:
On the morning of building our cannon, we had our mind set on a precise design. We had worked on the design the previous day and found it pretty well-planned only to be proven wrong later that day.
1. My group and I had decided to cut one of the tennis ball cans in half, so we can use it as a way to support the other tennis ball can that would be the part of the cannon shooting the tennis ball. The tennis ball can that would be cut would also contain a hole big enough that it would be able to have the the barrel go through it.

2. We then had gathered our materials which had consisted of two tennis ball cans, a strip of 18 inches of tape, and our basic building materials (scissors, protractor). Since one of the tennis ball cannons would be cut in half, the scissors would help us cut the can.
3. We then precisely cut off the bottoms of the cans.(the bottoms would later be used as a standstill to keep the cannons upright)After we had cut of the bottoms we cut one of the cans in half.(The half would play as a support unit for our barrel.)

4. Before cutting the circle that would be placed in the middle of the can(cut in half), we simply used a compass to get the perfect measurement of the circle. We traced it and then cut the circle.We then tried to assemble our cannon.

We had tried many ways to assemble it.

5.While building our cannon we had discovered that our design did not work, so we had to work around what we had already. We had decided that we would still have a decent angle measurement if we had just turned the already cut piece of the can sideways. So we drew it out to see how it would possibly work.

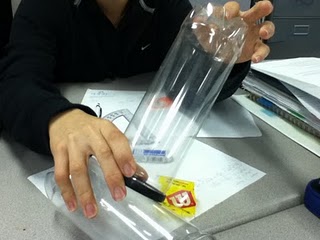
6. This had shown to be a better method and it was more reliable, but to be sure we took one of the bottoms that we recently removed and placed it behind the half of can. (In the image above you can see our new creation.)
7. We finally had placed a hole towards the end of our cannon using the sharp edge of an compass. That hole will later be useful when is comes to firing our cannon.

Final Product!
Conclusion: Please stay tuned for the results. Since weather conditions haven't been very well, we have not been able to fire our cannons. But rest assure, soon as we do fire them I will update. Thanks for reading!(:
Great job, Starr! I like how you divided it into steps, it made it a lot easier to read than just big chunky paragraphs.
ReplyDeleteStarr this is really great!
ReplyDeletegreat description. The pictures really enhance the whole thing!
ReplyDelete